Divide Terrain
 left click
This command divides the terrain into two parts using a closed curve and generates a zone on it. The new division or region can have a different color and material than the rest of the terrain.
The divisions can also be created from Earthmoving operations such as Hole, Cut and Fill, or Path.
Add a Division
Steps:
- Pick a terrain. Press Enter or right-click when done.
- Select a closed curveto define the divided area.
- The division is created in the terrain.

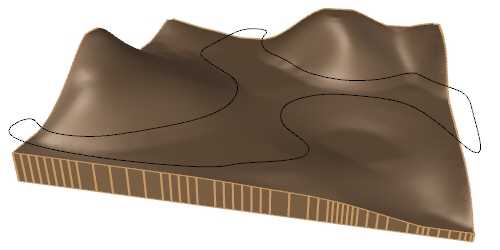
Terrain and the curve selected to create the division

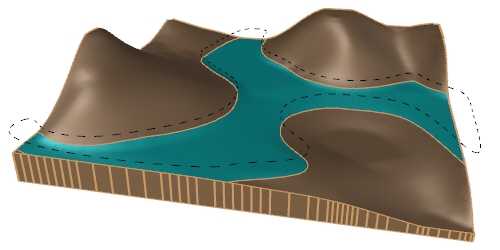
Terrain divided in two areas
Control points
The control points of the terrain division allow you to modify the contour of the subdivision. They are the same as those of the curve used for this operation. In addition, there is a move control arrow to reposition the entire subdivision.
These control points are integrated with the terrain and are visible when the terrain's control points are enabled.
Control points can be disabled in the Division tab,in the Properties area of the Edit panel, after selecting the subdivision from the selection list.
Options and Parameters
The Division parameters are divided into different tabs. They are available from the Properties area of the Edit panel, once selected under the Divisions list.
For the Divisions to appear in the selection list, the terrain must first be selected from the viewport.
Division

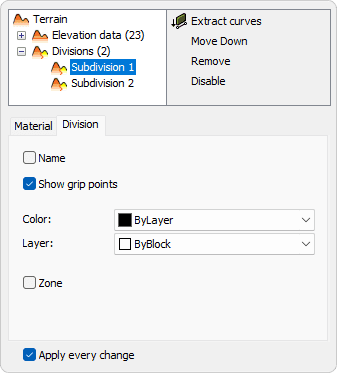
Division tab in Properties area.
- Name
Rename the earthmoving operation. - Show grip points
Enable or disable the control points of the subdivision area. - Color
Set the color for the subdivision. The color can either inherit the color of its layer, block, or be set as a custom color. - Layer
Layer name where the plant object is located. - Zone
Generates a zone object in the same area. When this checkbox is selected, the Zone tab is enabled for this operation, the settings are the same as those of a zone created with the laZonify command.
Material

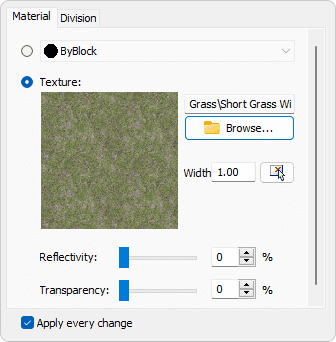
Material tab in Properties area.
This tab lets you change the textured image assigned to this element and define the image size, reflectivity and transparency.
NoteThe parameters can be edited for each subdivision. If you select the node (Divisions) from the selection list instead of a specific subdivision, the modified parameter will be overwritten for all subdivisions.
Edit options
These are the available edit options for the subdivisions,accessible in the Edit area of the Edit panel:
