Render Commands
 left click
The Render command renders the model using the current renderer producing a color image in a separate display window.
Render image
Steps:
- Choose a render from the current render list on the Rendering panel.
Rhino Render is set as the default; in case you have additional rendering plugins, they will also appear in the list. - Set the view you want to render as the active viewport.
- Adjust the render settings from the Rendering panel. Then click on the Render icon from the Visualization Toolbar or from the bottom of the Rendering Panel.
Selected rendering engine will open in a separate display window. Once finished, the text "Render done" will appear in the bottom left corner, and it will be ready to save.
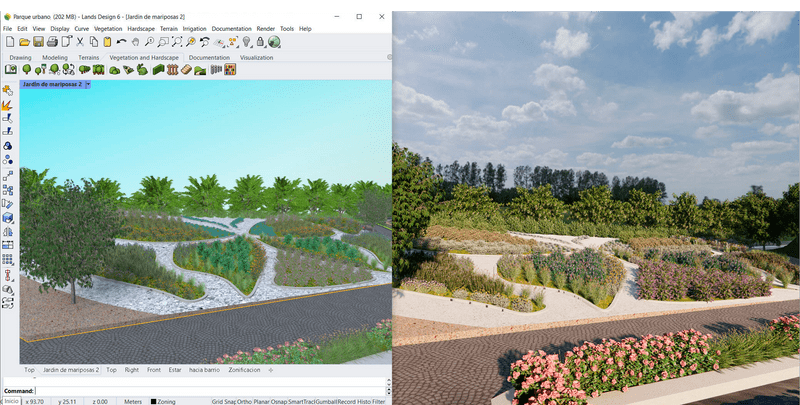 Model in viewport (left), rendered image (right).
Prepare the scene
These are some of the basic steps that are needed to prepare the render scene:
- Prepare the Scene: Move, rotate, or adjust the zoom until you see the desired picture in the active viewport.
- Set Up the Background and Ground Plane: Add a background for the scene using the Rendering panel, Background section.
- Add lighting: If you do not add any light sources to your scene, the default light is used. Adjust the direction and intensity of the light through the Rendering panel, Lighting section.
- Assign materials: Objects will render white until you add render color, highlight, texture, transparency, and bumps. These attributes are controlled through the Material panel.
- Render: Initiate the rendering process.
Although the steps do not have to be done in this order, using this method seems to make setting up a scene more efficient. To improve quality, repeat these steps until the image looks right to you.
Optimization tips
Optimizing the model before rendering is crucial for achieving more efficient renders and reducing rendering time. Some actions that will help you are:
- Hide or remove objects that will not be visible in the final render, as well as reference elements, auxiliary geometry, or details that do not contribute significantly to the final result.
- Group similar objects and organize them into layers. This will facilitate control over visibility and object manipulation during render preparation.
- Clean the file to eliminate unnecessary information. Some actions you can take include using laPurge command to delete Lands unused elements, or typing "purge" in the command line to delete unused block definitions, groups, layers, hatch patterns, annotation styles, linetypes, materials, textures, and environments from the model.