Materials panel
The Materials panel displays the created or imported materials in the scene which specifies the color, finish, transparency, texture, and bump for use by the built-in Rhino renderer.
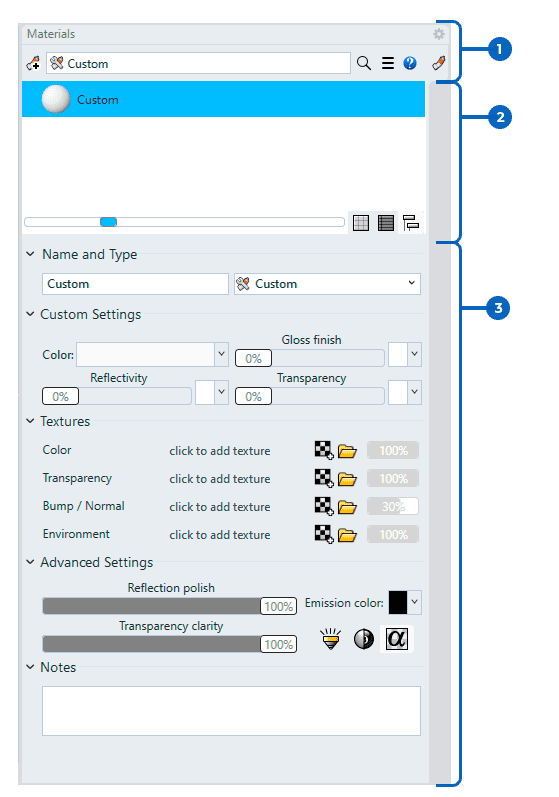
The Materials panel is divided in three sections or areas:
 Materials Panel
1. Materials toolbar line
![]() Add material
Add material
Select an action to create a new material:
 Import from material library: Imports a material (.rmtl) from the Render Content library folder.
 Create Physically Based material from texture files: Creates a physically based material from image files, or a PBR texture set (.zip).
(Free or paid PBR texture sets can be downloaded from the Internet.) Choose existing: Creates a new material by using an existing material as the template.
 Blend: Creates a new blend material.
 Custom: Custom materials have all possible settings available in the editor.
 Double Sided: Creates a new double sided material.
 Emission: Creates a new emission material.
 Glass: Creates a new glass material.
 Metal: Creates a new metal material.
 Paint: Creates a new paint material.
 Physically Based: Creates a new physically based material.
 Picture: Creates a new picture material.
 Plaster: Creates a new plaster material.
 Plastic: Creates a new plastic material.
 Gem: Creates a new gem material.
 More types: Creates a new material from the Material Type Browser dialog.
![]() Current item
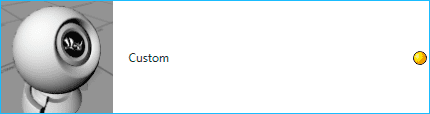
Current item
Displays the current item icon and name.
![]() Search
Search
Click the search box to display a menu for searching names, notes, or tags.
![]() Menu
Menu
Displays the Tools menu.
 Assign to Objects Assigns the current material to selected objects.
 Assign to Layers of Objects Assigns the current material to the layers of selected objects.
 Assign to Layers Assigns the current material to selected layers.
 Assign to ground plane Assigns the current material to the Ground plane.
 Select objects Select objects that use the current material.
- Create New Creates a new material from a template.
- Import from material library Imports Material from the Render Content folder, Internet connection is required to download online.
- Create Physically Based material from texture files Creates a physically based material from image files, or a PBR texture set (.zip).
 Save to File... Saves a material to a Rhino .rmtl file.
 Copy Copies the selected item to the Clipboard. The Clipboard can then be pasted into the editor to create a new item.
 Paste Creates a new material based on the Clipboard contents.
- Paste as Instance Creates a new material based on the Clipboard contents that is linked to the original through instancing.
 Delete Deletes the selected material.
- Select All Select all the materials of the editor.
 Replace Replace the selected material with another new or existing material.
 Reset to Defaults Changes all the material settings to the default white, matte, non-reflective, untextured material.
 Duplicate Copies the selected material to a new material with the same settings.
- Merge Identical Material Finds materials with the same settings in the model, keeps one of them, and deletes the rest.
 Edit Floating Edits the selected item in a separate dialog.
 Tags Pops up the Render Content Tag dialog to manage tags. Tags group or categorize items to make searching easier.
 Filter by Tags Hides the items that don't have the selected tags.
 Sort Alphabetically Lists the items with their names in ascending (A to Z) order.
 Remove Instancing Removes the connection between instanced items.
 Update Preview Now Updates the preview of the selected item when auto-update is disabled.
 Grid Displays the previews as a grid of thumbnails.
 List Displays the previews as a list of thumbnails.
 Tree Displays the previews as a tree showing nesting.
 Show All Materials Displays used and unused materials.
 Show Only Used Materials Hides unused materials.
 Show Only Unused Materials Hides used materials.
 Horizontal Layout Displays the previews to the left of the controls.
- Thumbnails Adjust the appearance of the preview thumbnail.
![]() Help
Help
2. Materials list
List all the materials contained in the file, showing their name and thumbnail. The icons at the lower-right corner of a material thumbnail indicate the status of the material.
![]() The material is used by objects not in selection.
The material is used by objects not in selection.
![]() The material is used by objects in selection.
The material is used by objects in selection.
![]() At least one external image used by the material is missing.
At least one external image used by the material is missing.
Thumbnail actions
- Right-click a thumbnail to display the context menu.
- Right-click the blank area of the thumbnail browser to display the New material context menu.
- Drag and drop to a different position in the list to reorder.
- Drag and drop with Ctrl to a blank area to make a copy.
3. Materials Properties
Name and type
The name and the type of the current material.
Custom settings
The properties and settings of a material change depending on the type.
The default material is white and matte, with no reflectivity or transparency.
Color
Sets the material's base (also called diffuse) color. Click the color swatch to select a color from the Select Color dialog.
Gloss finish
Adjusts the highlight from matte to glossy and sets the color of the glossy area.
- Move the slider to change the value.
- Double-click the slider to enter a number.
- Click the color swatch to select a color from the Select Color dialog.
Note Set the color to match the base color for metallic materials. Set the color to white for plastic materials.
Reflectivity
Sets the material's reflectivity amount and sets the reflective color
- Move the slider to change the value.
- Double-click the slider to enter a number.
- Click the color swatch to select a color from the Select Color dialog.
Transparency
Adjusts the transparency of an object in the rendered image.
- Move the slider to change the value.
- Double-click the slider to enter a number.
- Click the color swatch to select a color from the Select Color dialog.
IOR (Index of Refraction)(The IOR setting is hidden when Transparency is 0%.)
This value defines the bending of a ray of light when it travels from a transparent material into another. Example IOR values are shown in the dropdown next to the value.
Textures
Textures (images or procedural textures) can be used for color, transparency, bump, and environment.
Supported file formats:
- Do not support transparency: JPEG - JFIF Compliant (*.jpg, *.jpeg, *.jpe),Windows Bitmap (*.bmp)
- Support transparency: DDS files (*.dds), HDRi files (*.hdr, *. hdri), OpenEXR files (*.exr), Portable Network Graphics (*.png), Tagged Image File Format (*.tif, *.tiff),Truevision Targa (*.tga)
To use a texture
Add a new texture
Select a new texture by types.
- Click the texture name to edit the texture.
- When a texture has been added, right-click the texture name to show the Context menu for actions.
Select an external bitmap image file on the computer.
- Click the texture name to edit the texture.
- When a texture has been added, right-click the texture name to show the Context menu for actions.
Delete the texture being added.
Turn texture on/off
Enable or disable the texture.
Value
Control visibility level of the texture.
- Drag the mouse cursor to change the value.
- Double-click to enter a value.
Color
Sets a color swatch as the material's base (also called diffuse) color. Or, adds a texture.
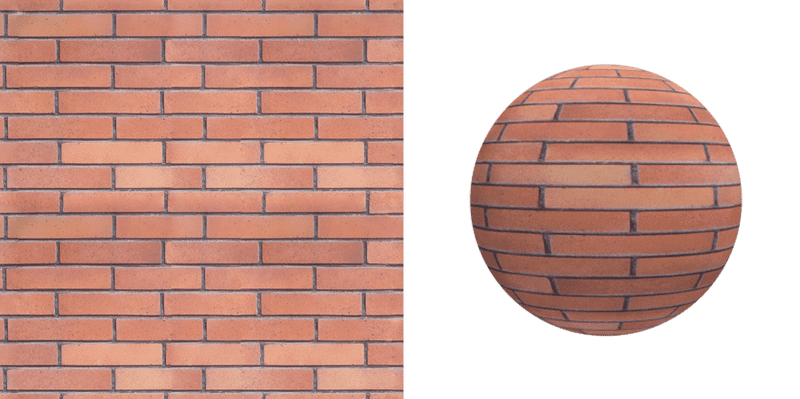 Bricks texture applied as a material color.
Transparency
Uses a texture to control the material's transparency.
Bump / Normal
Uses a texture to control the material's bump depth or object's normal direction.
Bump and Normal maps add details to surfaces in rendering without modifying the shape of the surface.
Bump map
Uses grayscale values of a texture to make a surface appear bumpy.
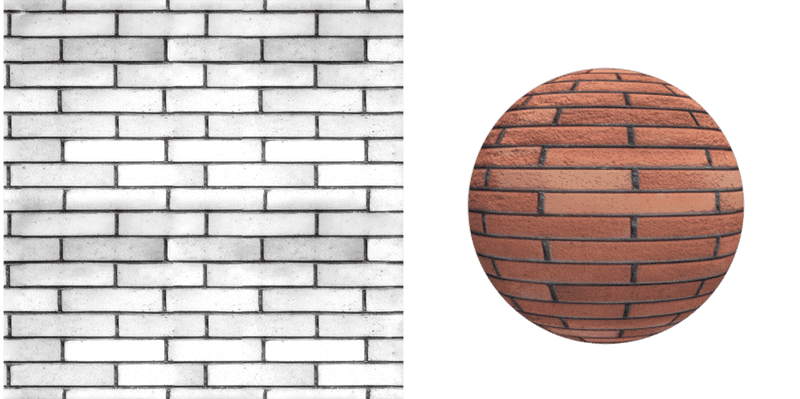 Texture applied as a bump map makes the bricks look bumpy and realistic in render.
Normal map
Uses RGB values of a bitmap image to alter surface normal directions.
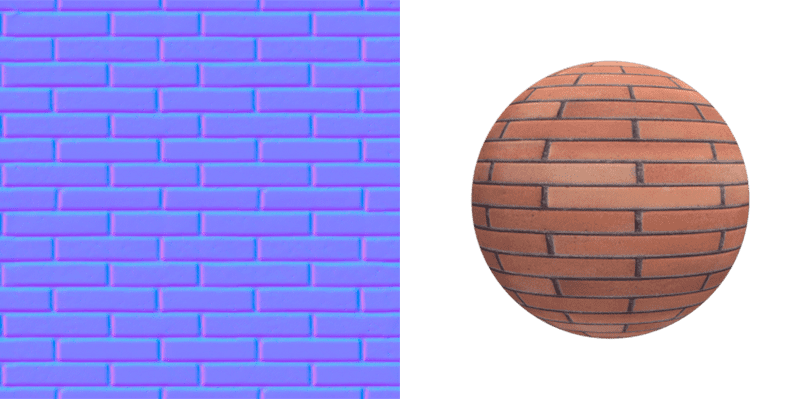 Texture applied as a normal map creates a sense of 3D through the orientation of light.
Environment
Uses a texture as the material's environment reflection.
The image should be an angular map or light probe projection (spherical) image. Other image projections will produce the reflection effect, but it will be distorted and not produce the realistic environment reflection.
Advanced Settings
Reflection polish
Makes the surface reflections fuzzy. For surfaces that are perfectly reflective, such as mirrors and chrome, use 100% polish. Lower values model materials like certain plastics and the sanded surface of frosted glass.
Changing this setting can increase rendering time.
Transparent clarity
Controls the clarity of the material.
Changing this setting can increase rendering time.
Emission color
Adds a color to the shaded result. It does not take into account the lighting, so if the emission color is white, the object will always appear white. If the emission color is gray, all parts of the object will appear brighter than they would otherwise. Lower values model materials like certain plastics and the sanded surface of frosted glass.
Changing this setting can increase rendering time.
![]() Self-illumination
Self-illumination
Allows the material to render the diffuse color with shadowing and shading by enabling diffuse lighting.
On
If this setting is on, the object renders with shadowing and shading.
Off
If this setting is off, the object will render the diffuse color all over with no shadowing or shading. Turning this setting off ensures that the color the texture of picture frames remains constant over the surface.
![]() Fresnel reflectivity
Fresnel reflectivity
Causes objects to reflect fully at glancing angles and only slightly reflect when the object is seen head on.
This effect simulates many transparent or semi-transparent materials, such as glass, plastic, and materials that have a thin transparent glaze, such as laminated paper, polished woods, and paint.
![]() Alpha transparency
Alpha transparency
Allows images with an alpha channel for transparency to make the object transparent in the areas of the image where the alpha channel is applied.
Notes
Extra text information stored in the material that appears in the tooltip when you mouse-over the thumbnail.